This guide will walk you through the process of creating a vertical video gallery (grid layout) using the ReelsWP plugin in WooCommerce. By following these steps, you can create a grid of videos that will engage users and allow them to explore your products in a more interactive way.
Step 1: Install and Activate ReelsWP
- You need the ReelsWP plugin installed and activated on your website.
- You can find detailed installation instructions in our dedicated installation blog post.
- Install the plugin and click Activate once the installation is complete.
Step 2: Open ReelsWP Plugin
- After activation, you will see the ReelsWP option in the left sidebar of your WordPress dashboard.
- Click on ReelsWP to open the plugin’s interface.
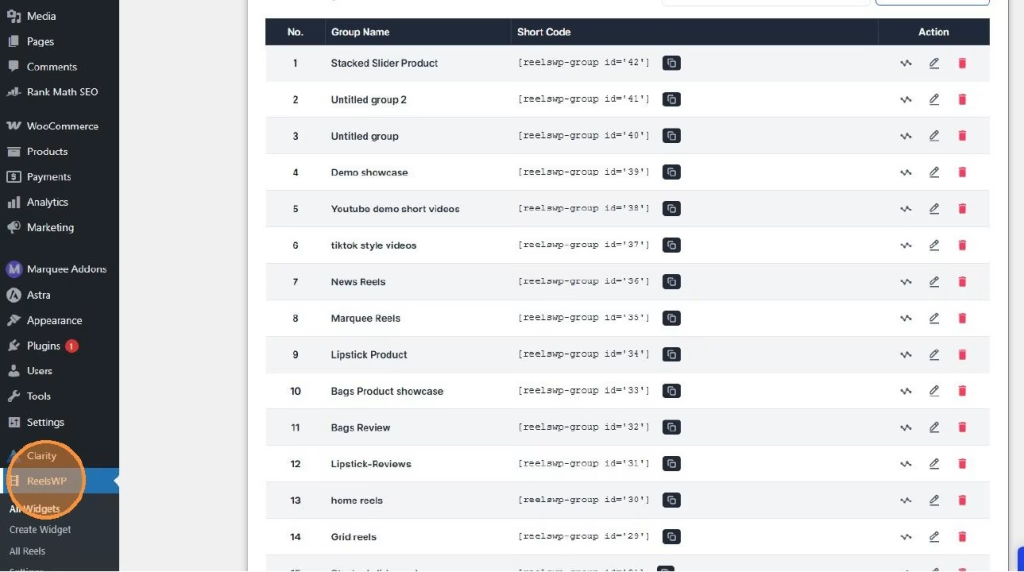
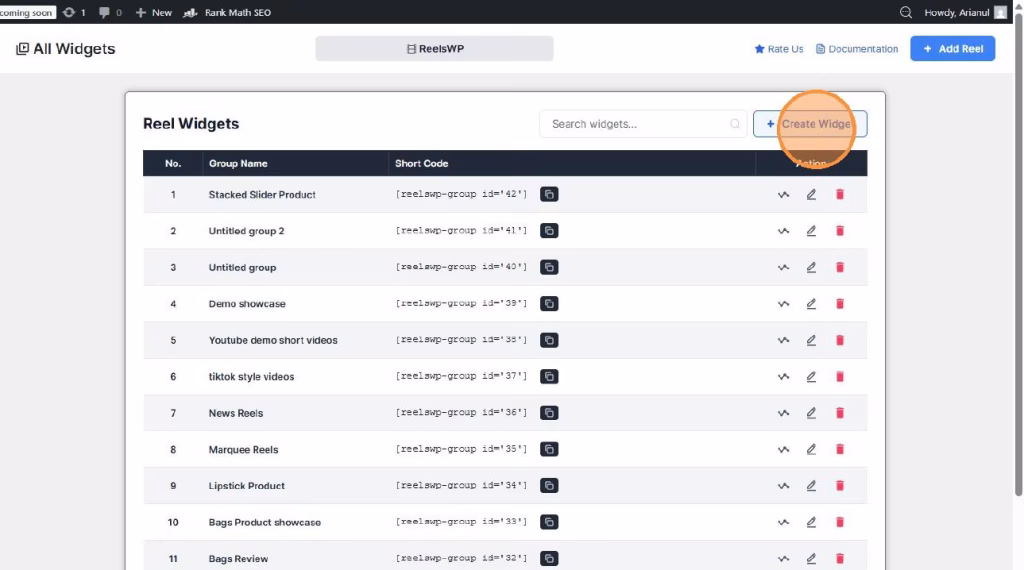
Step 3: Create a New Widget
- On the ReelsWP Dashboard, click the Create Widget button.
- You will be directed to a new screen where you can set up your widget for the video gallery.
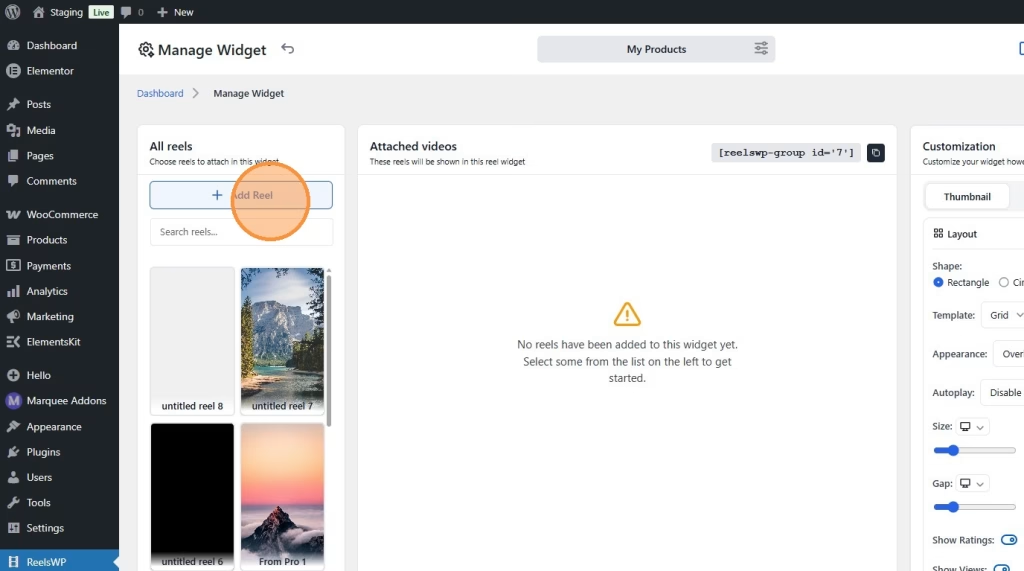
Step 4: Add Videos to the Widget
- Click the Add Reel button.
- You will be prompted to upload your videos. Choose the videos you want to display in the gallery.
- After uploading, you can add titles and other relevant information to each video.
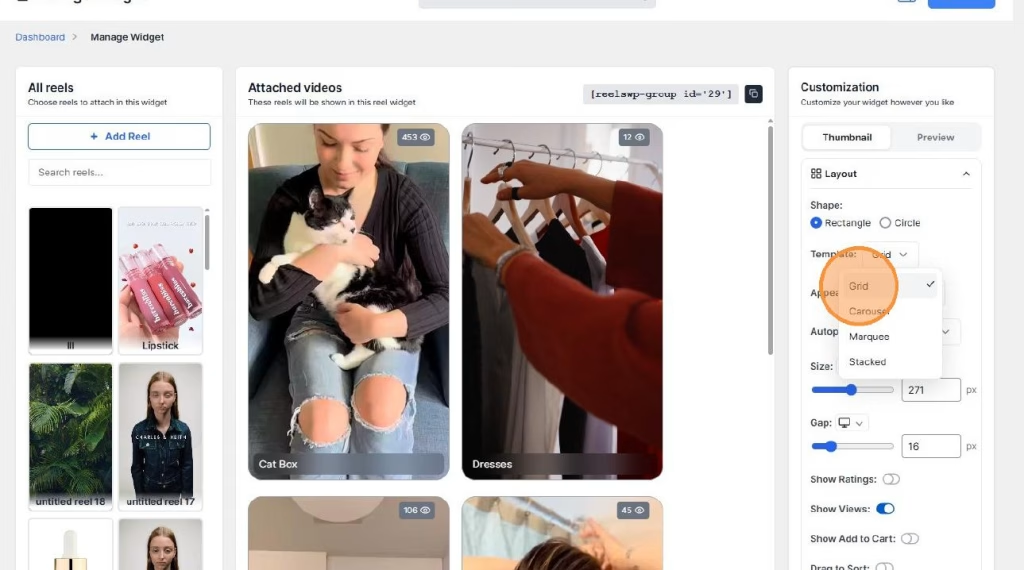
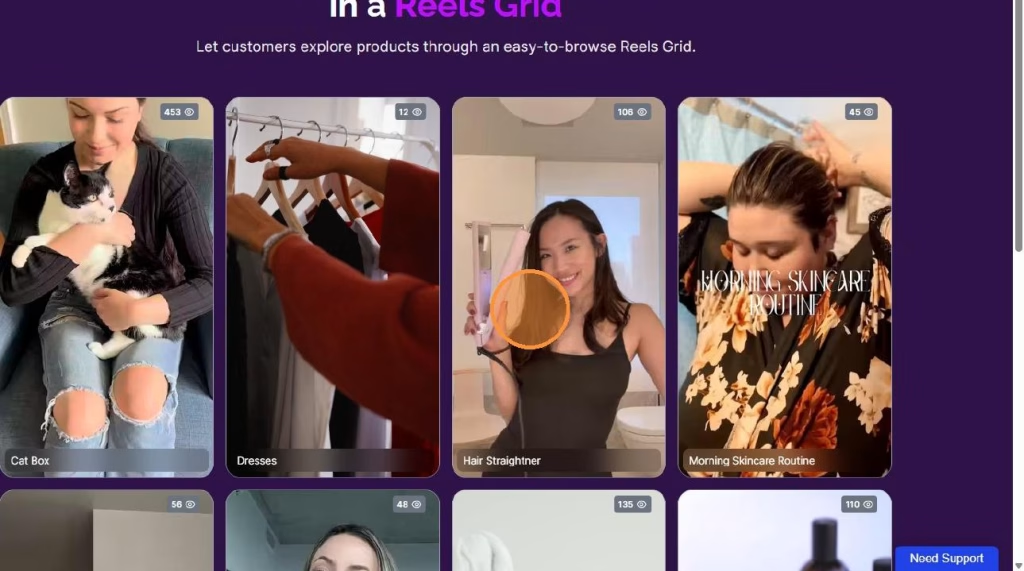
Step 5: Configure the Video Gallery Grid Layout
- In the Manage Widget section, select the Grid option for the layout.
- You can configure the following settings:
- Shape: Choose between a Rectangle or Circle shape for your video thumbnails.
- Template: Select the Grid template for a clean, vertical layout.
- Appearance: Choose the Classic or Overlay appearance, depending on how you want the thumbnails to display.
- Autoplay: Enable autoplay to automatically play videos when users interact with the gallery.
- Size: Adjust the size of the thumbnails according to your design preference.
- Gap: Set the space between each video in the grid.
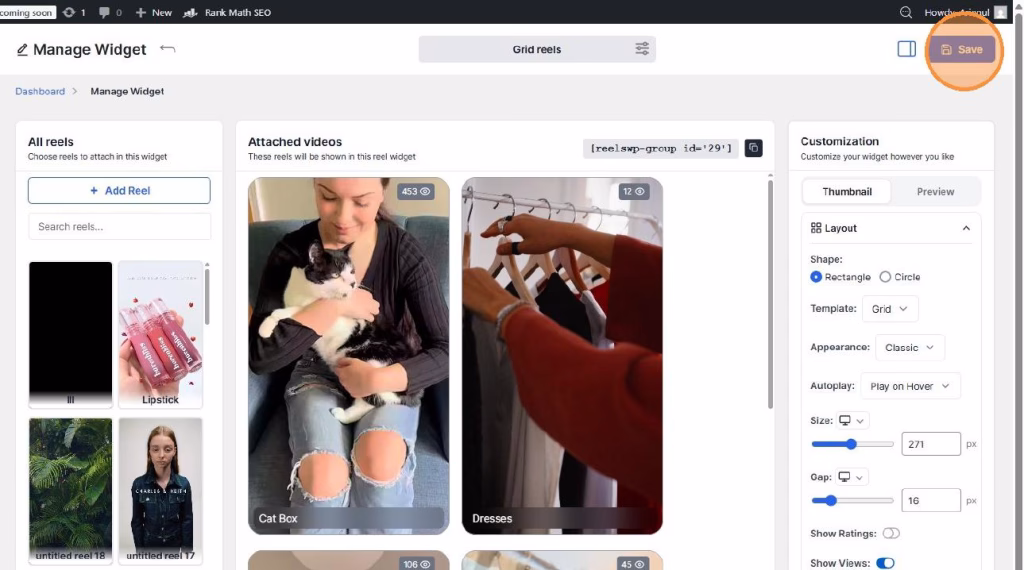
Step 6: Save the Widget
- Once you’re satisfied with your video settings, click Save to store your widget.
- Your widget is now ready to be added to any page or product in WooCommerce.
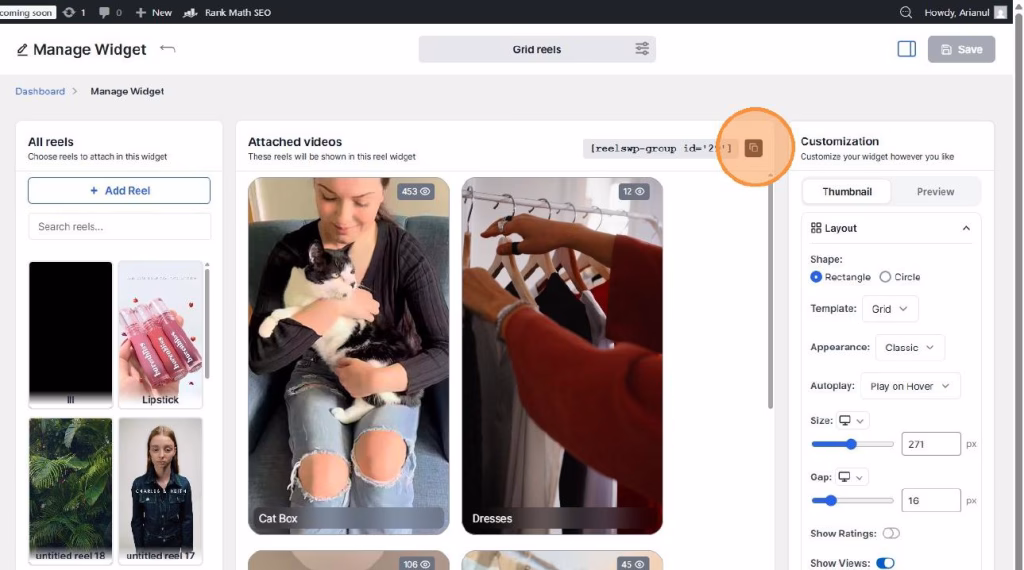
Step 7: Copy the Shortcode
- After saving, you will see a shortcode for your newly created video gallery.
- Copy the shortcode to embed the gallery on your WooCommerce product pages or any other page.
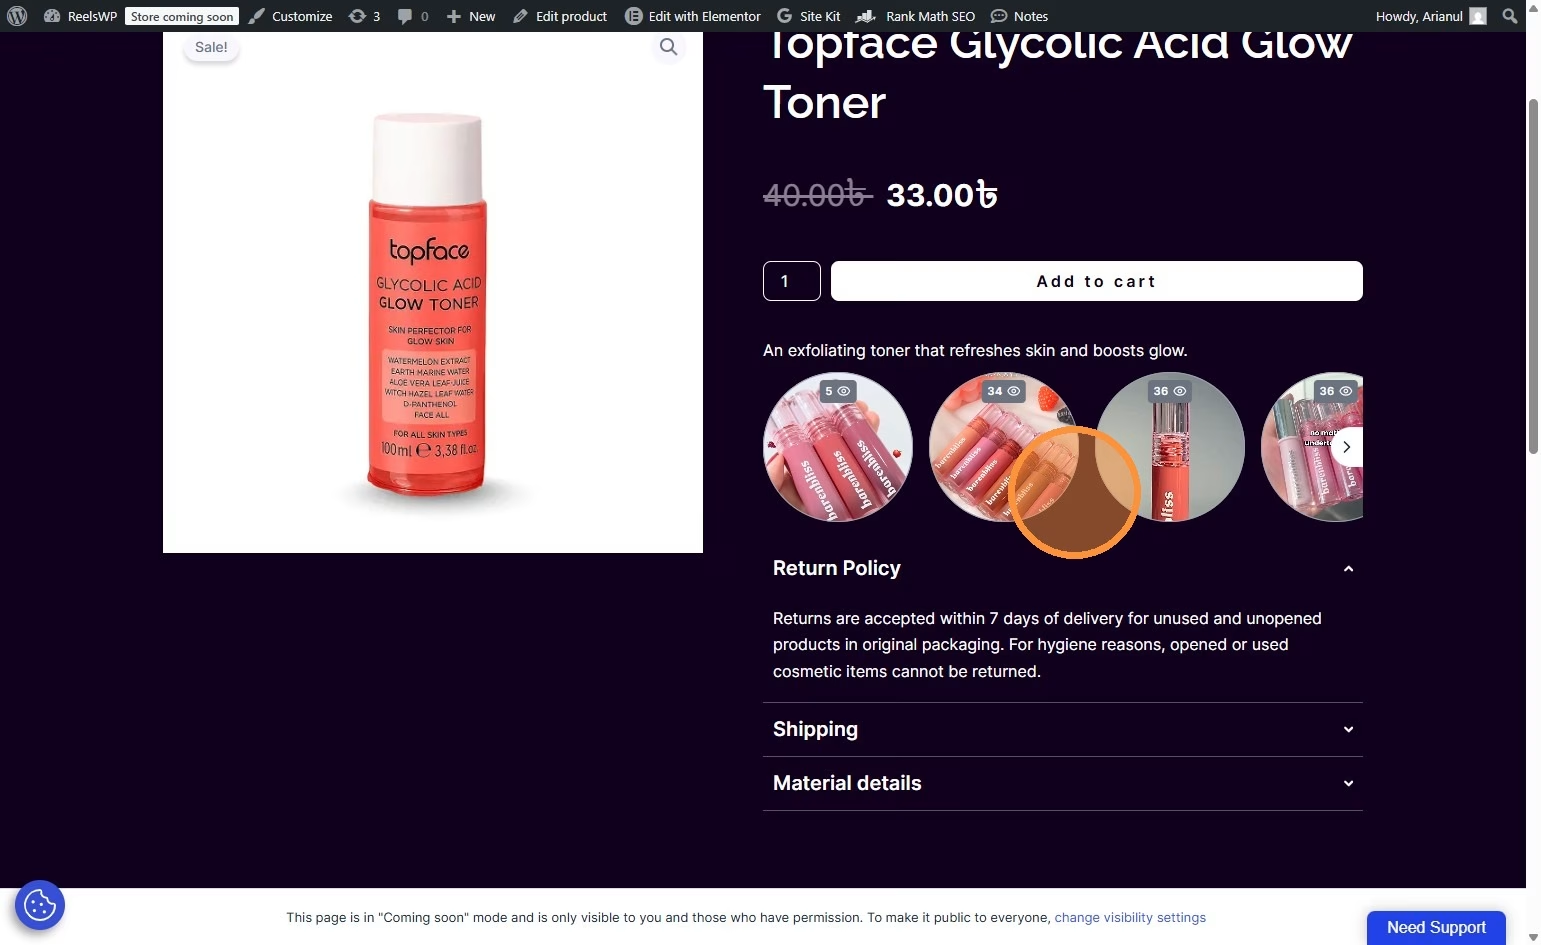
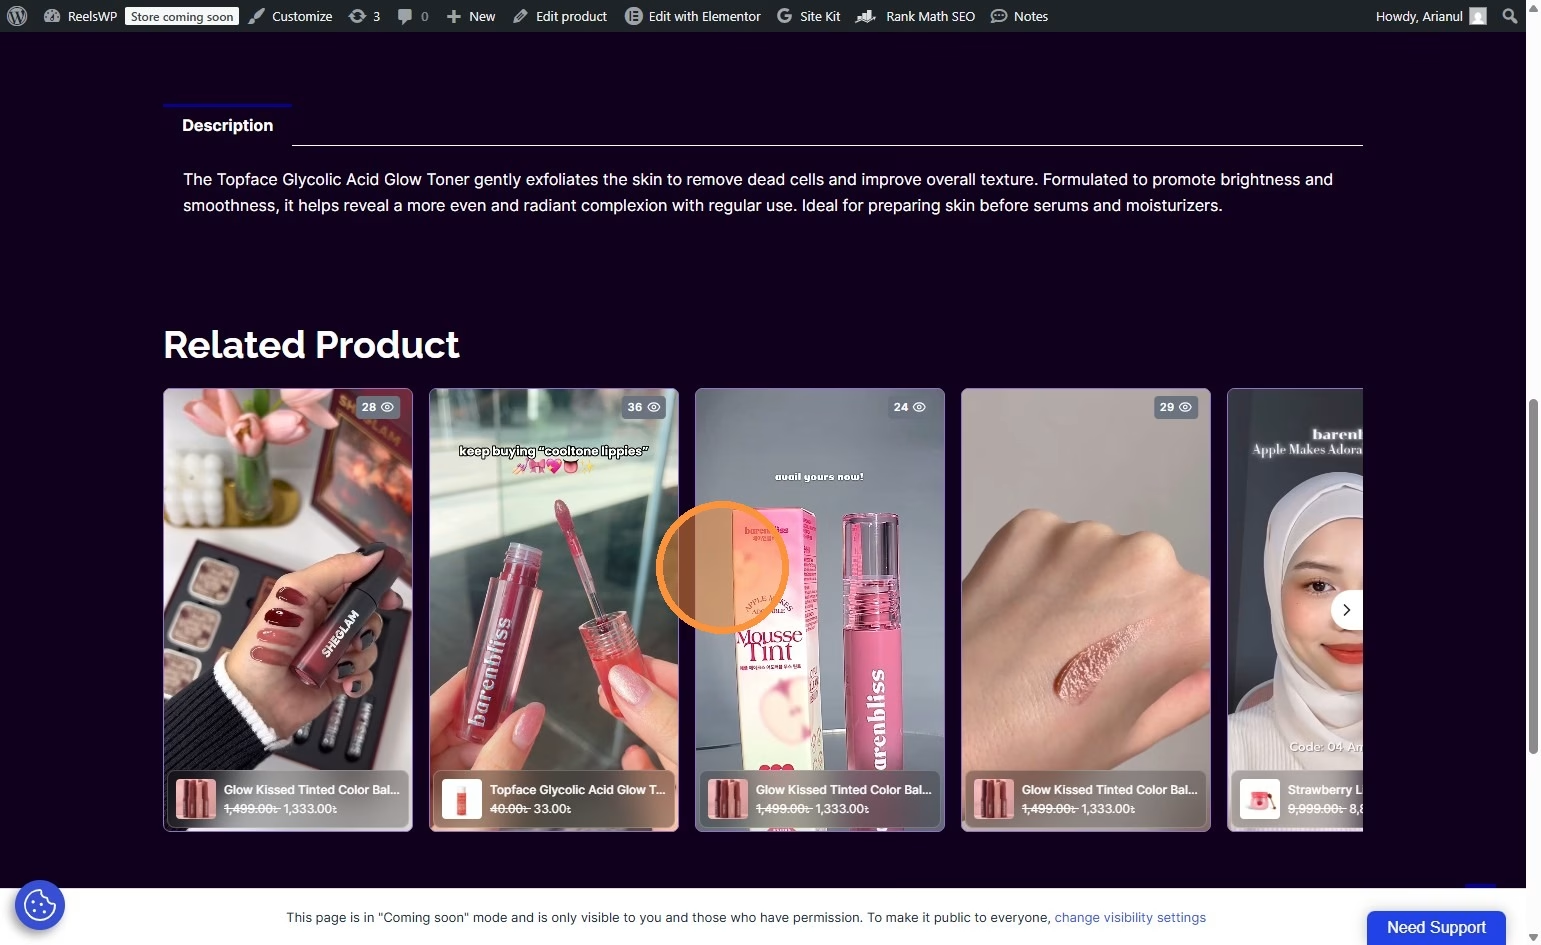
Step 8: Add the Grid to Your WooCommerce Page
- Open the WooCommerce product or page where you want to display the video gallery.
- Paste the shortcode into the page or post editor.
- You can drag and drop the ReelsWP Widget to your editor also.
- Click the dropdown menu and select your reel group
- Click Update to save your changes.
Step 9: Preview the Video Grid
- Visit the page where you added the video gallery to preview it.
- Make sure the grid layout is working correctly, and the videos are displayed vertically with the desired layout.
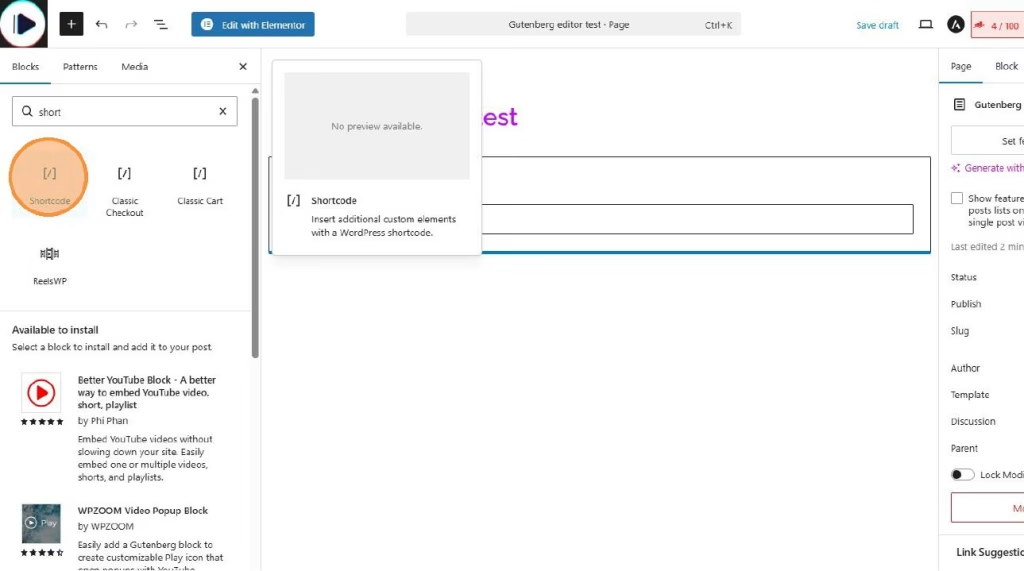
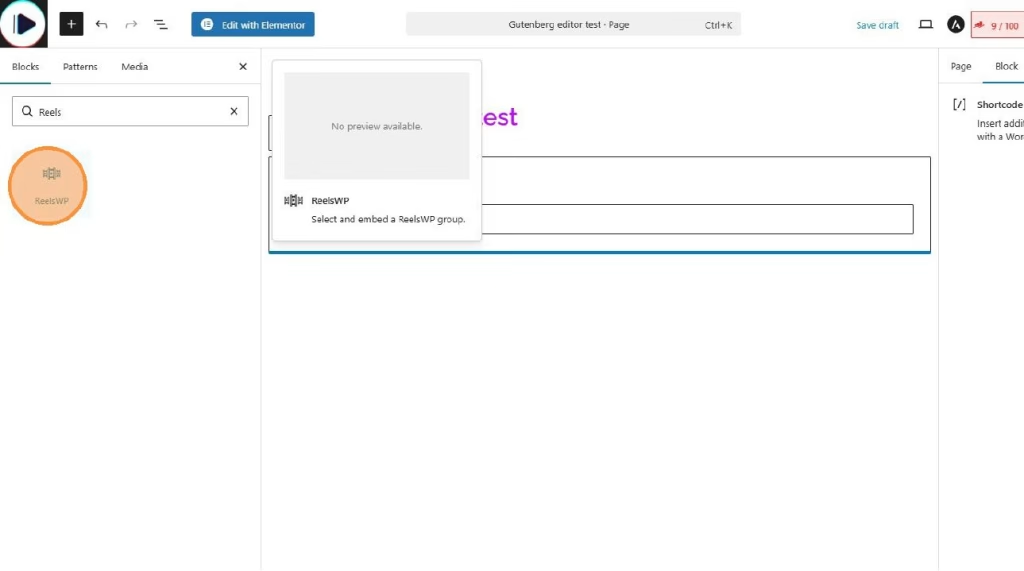
You can also use reelsWP block for block editor (for block themes) or using Elementor (ReelsWP elementor widget).
FAQs
1) How do I make the video thumbnails clickable?
The video thumbnails will be clickable by default. When users click on a thumbnail, the video will open and start playing. You can also link each video to a product page or another destination.
2) How many videos should I add to the grid?
It’s recommended to add 6 to 12 videos for optimal performance and user experience. Too many videos can make the grid feel cluttered.
3) How do I change the video order in the grid?
You can reorder the videos by dragging and dropping them in the Manage Widget section of the ReelsWP dashboard.
4) Why aren’t my videos showing in the grid?
Ensure that the videos are properly uploaded and that you’ve selected the correct Grid layout. Also, double-check that the widget is saved and the shortcode is correctly placed in the page.
5) Can I add product tags to the videos?
Yes, you can tag products in the videos. Simply use the Tag Products option in the reel creation process to link products to your videos.
6) Can I change the spacing between the videos?
Yes, you can adjust the Gap setting in the widget customization options to change the space between videos in the grid.
7) Is it possible to add video captions or descriptions?
Yes, you can add captions or descriptions during the video upload process. These will appear along with the video in the grid.
8) How do I make the grid responsive for mobile devices?
The grid layout is automatically responsive, meaning it will adjust to different screen sizes. However, you can customize the grid size in the widget settings to ensure it looks great on both desktop and mobile.
9) How do I remove a video from the gallery?
To remove a video, go to the Manage Widget section, find the video, and click the Delete option next to it.
10) Can I use this grid layout for non-product videos?
Yes, the grid layout can be used for any type of video, not just product-related content. You can create galleries for blogs, tutorials, or other types of media.
By following these steps, you can easily create and manage a vertical video gallery grid on your WooCommerce site using ReelsWP, offering a unique and engaging experience for your visitors.