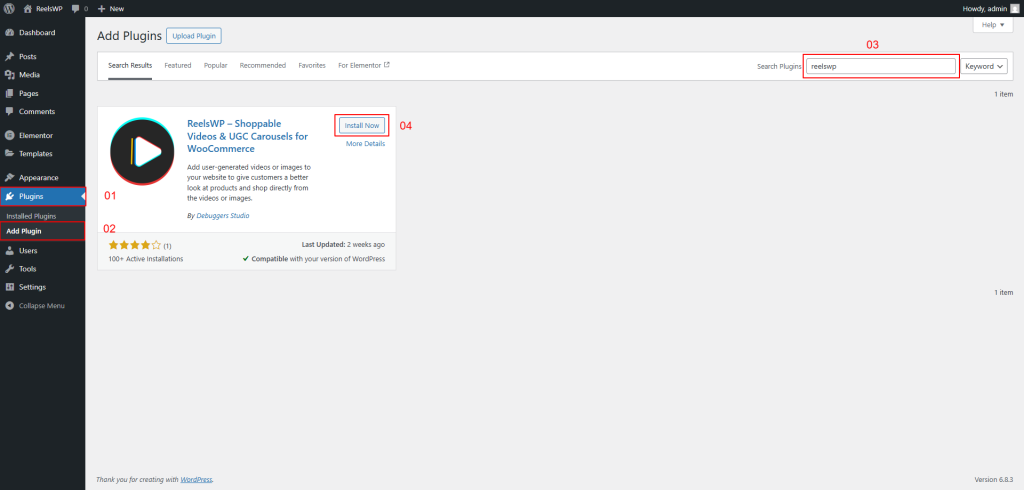
Go to your WordPress dashboard, click Plugins → Add New, and in the search bar type ReelsWP. Once the plugin appears (by Debugger Studio), click Install Now, wait for the installation to finish, then click Activate. The plugin will now be ready to use on your website.
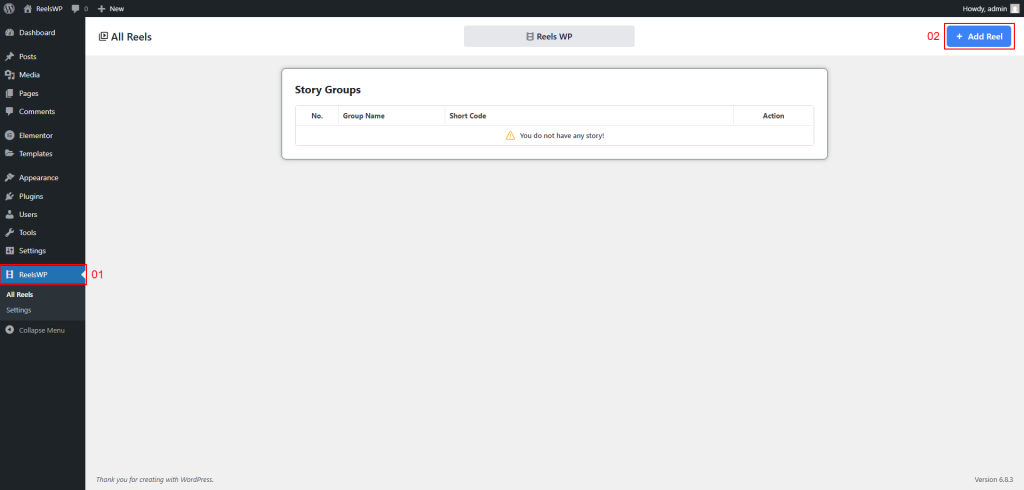
After installing the plugin, from your WordPress dashboard and click ReelsWP . This will open the All Reels page, where you can manage your story groups. To create your first reel, click the Add Reel button on the top right.
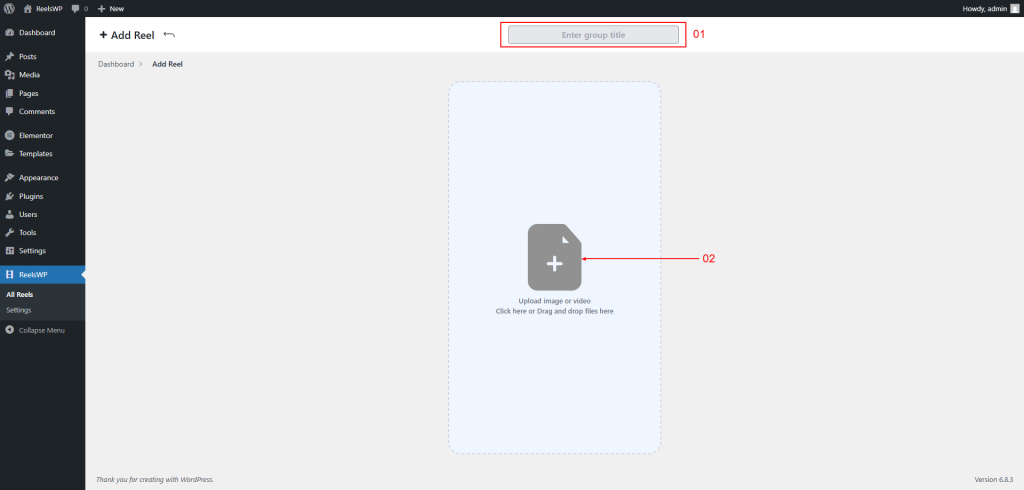
After click on Add Reel button, start by entering a Group Title in the input box. Then, upload your media files by clicking the upload area or dragging and dropping videos or images into it. Once uploaded, the files will be added to your new story group.
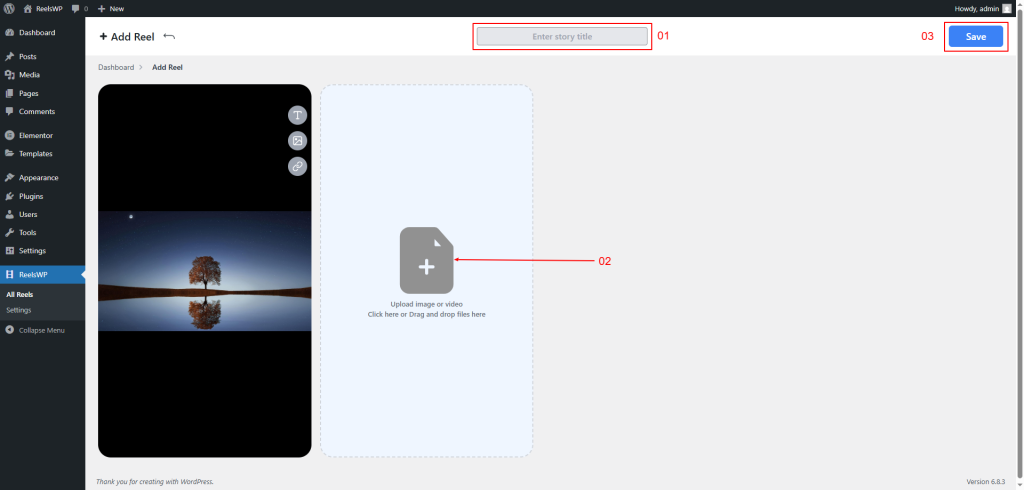
Enter a Story Title at the top , then upload an image or video by clicking the upload area or dragging your file into it . Once your media is uploaded and previewed, click the Save button on the top right to store your story. Your story will now be added to the group and ready for use on your website.
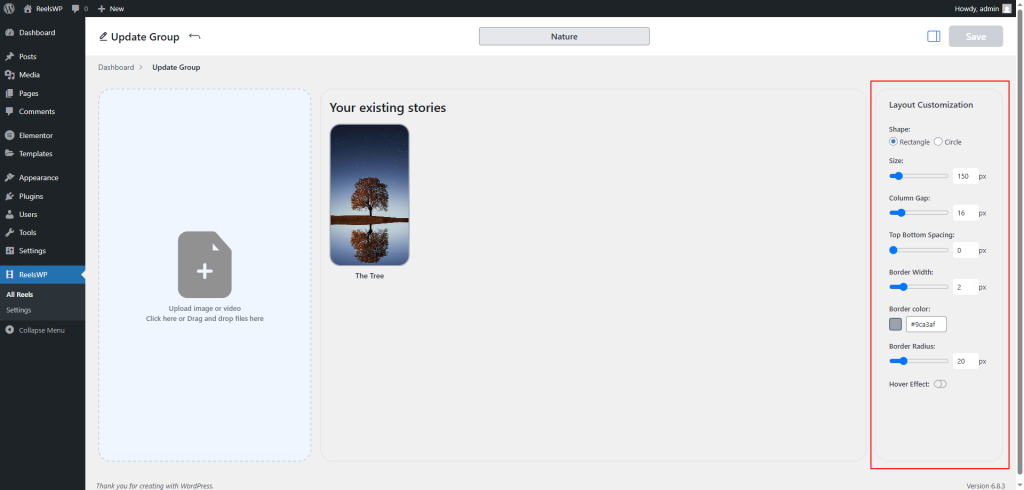
After add story you’ll redirect to Update Group page, where you can customize how your reels appear on the website. From the Layout Customization panel on the right, adjust the reel shape (rectangle or circle), size, column gap, top and bottom spacing, border width, border color, and border radius. You can also enable the hover effect for added interactivity and also you can add more story. After making your adjustments, click Save to apply the new layout settings.